现在css预处理器是项目的标配,感觉用不到 css variable 这个特性,之前对它的了解大概局限于跟 :root{} 有关系,但是直到看到vantui小程序文档时看到这样的介绍:
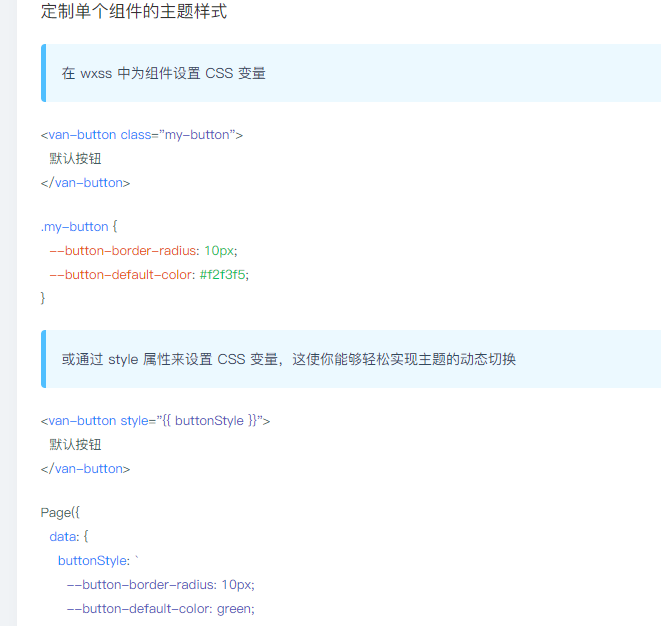
貌似是一座小金矿...
什么是css变量
带有前缀--的属性名,比如--example--name,表示的是带有值的自定义属性,其可以通过 var 函数在全文档范围内复用的
一般来说css变量(CSS variable)要与 var()函数 一起使用
CSS variable
声明变量的时候,变量名前面要加两根连词线(--),它们与color、font-size等正式属性没有什么不同,只是没有默认含义。所以 CSS 变量(CSS variable)又叫做"CSS 自定义属性"(CSS custom properties)。因为变量与自定义的 CSS 属性其实是一回事。
var()
var()函数可以代替元素中任何属性中的值的任何部分。var()函数不能作为属性名、选择器或者其他除了属性值之外的值。(这样做通常会产生无效的语法或者一个没有关联到变量的值。)
方法的第一个参数是要替换的自定义属性的名称。函数的可选第二个参数用作回退值。如果第一个参数引用的自定义属性无效,则该函数将使用第二个值: var( <custom-property-name> , <declaration-value>? )
简单的使用
- 首先要定义变量,如:
:root { --main-theme: #89a; },但是声明后没有默认含义,可以理解为预处理器定义的变量,没被使用就没有意义。。。 - 然后需要在需要它的标签样式内使用:
div { background: var(--main-theme); }也可以用在行内样式中
<div style="background: var(--main-theme);">
:root {
  --main-theme: #89a;
}
div {
  background: var(--main-theme);
}
与JavaScript通信
JS中操作CSS变量常用的API:
- 读取变量:
elem.style.getPropertyValue() - 设置变量:
elem.style.setProperty() - 删除变量:
elem.style.removeProperty()
https://codepen.io/justwe7/pen/mdPjdXy
实战应用
精简代码,减少冗余
修改某些色块的不同状态
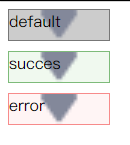
假如某个块有不同的状态,如果正常写css代码,可能需要样式覆盖来指定不同的颜色,单一的属性还好,要是background这种复合属性的写起来就感觉不是很语义化:
<div class="box">default</div>
<div class="box success">succes</div>
<div class="box error">error</div>
使用css样式覆盖:
.box {
  width: 100px;
  height: 30px;
  background: #ccc url('https://kano.guahao.cn/JsT348336686') no-repeat center / contain;
  border: 1px solid #777;
  &.success {
    margin-top: 10px;
    background-color: #f0f9ef;
    border-color: #7ebb7a;
  }
  &.error {
    margin-top: 10px;
    background-color: #fff5f5;
    border-color: #f78b8b;
  }
}
使用css变量写起来就很明了了:
.box {
  width: 100px;
  height: 30px;
  --bg-color: #ccc;
  --border-color: #777;
  background: var(--bg-color) url('https://kano.guahao.cn/JsT348336686') no-repeat center / contain;
  border: 1px solid var(--border-color);
  &.success {
    margin-top: 10px;
    --bg-color: #f0f9ef;
    --border-color: #7ebb7a;
  }
  &.error {
    margin-top: 10px;
    --bg-color: #fff5f5;
    --border-color: #f78b8b;
  }
}
优化媒询的代码
使用媒体查询的时候,我们需要将要响应式改变的属性全部重新罗列一遍
.main {
    width: 1000px;
    margin-left: 100px;
}
@media screen and (min-width: 1440px) {
    .main {
        width: 800px;
        margin-left: 50px;
    }
}
使用变量进行优化
:root {
  --main-width: 1000px;
  --left-margin: 100px;
}

.main {
  width: var(--main-width);
  margin-left: var(--left-margin);
}

@media screen and (min-width: 1440px) {
    :root {
      --main-width: 800px;
      --left-margin: 50px;
    }
}
看上好像是代码多了,多了一层定义的环节,只是示例的 CSS 改变的样式属性较少,当媒体查询的数量达到一定程度,使用 CSS 变量从代码量及美观程度而言都是更好的选择
与calc配合
实现一个缩放的效果
https://codepen.io/justwe7/pen/WNwKyom
与scale相同爽的写法,样式覆盖相同的重排。。。
:root {
  --scale: 1;
  --width: 80px;
  --height: 200px;
}
.container {
  width: calc(var(--scale) * var(--width));
  height: calc(var(--scale) * var(--height));
  border: 1px solid #000;
  transition: all 1s;
  background-color: yellowgreen;
  &:hover{
    --scale: 2;
  }
  &:active{
    --scale: 0.5;
  }
}
与js进行交互
修改主题
css的变量属性是可以通过js修改生效的:setProperty("--bg-color", "blue")
https://codepen.io/justwe7/pen/mdPjdXy
:root {
  --bg-color: #f09;
}
body {
  background-color: var(--bg-color);
}
let n = 0
const colors = ['#fa0', '#8aa', 'yellowgreen', '#fff']
document.addEventListener('click', () => {
  document.body.style.setProperty("--bg-color", colors[n%colors.length])
  n++
})
在空白区域点击鼠标就可以达到切换主题的效果了,相比之下,scss这类预处理器切换颜色主题的功能做起来就很麻烦了
做一个跟随鼠标移动的方块
https://codepen.io/chriscoyier/pen/yxVQJG
:root {
  --mouse-x: 0px;
  --mouse-y: 0px;
}
.mover {
  position: absolute;
  left: var(--mouse-x);
  top: var(--mouse-y);
  width: 50px;
  height: 50px;
  background: red;
}
let root = document.documentElement;

root.addEventListener("mousemove", e => {
  root.style.setProperty('--mouse-x', e.clientX + "px");
  root.style.setProperty('--mouse-y', e.clientY + "px");
});
做一个loading(与预处理器比较)
一个条形加载条通常由几条线条组成,并且每条线条对应一个存在不同时延的相同动画,通过时间差运行相同的动画,从而产生加载效果
/* sass版 */
.sass-loading {
  li {
    display: inline-block;
    border-radius: 3px;
    width: 6px;
    height: 30px;
    background-color: yellowgreen;
    animation: beat 1s ease-in-out infinite;
    & + li {
        margin-left: 5px;
    }
    @for $i from 1 through 5 {
      &:nth-of-type(#{$i}) {
        animation-delay: 200ms * $i;
      }
    }
  }
}
/* 变量版 */
.var-loading {
  li {
    display: inline-block;
    --time: calc((var(--line-index) - 1) * 200ms);
    border-radius: 3px;
    width: 6px;
    height: 30px;
    background-color: #f66;
    animation: beat 1.5s ease-in-out var(--time) infinite;
    & + li {
        margin-left: 5px;
    }
  }
}
看起来并没有太多的差别,但是要是考虑扩展性,假如线条的个数是可变的(或者是异步的),就需要在css中写一个安全的循环次数,而用变量来写的话不需要担心这个问题,假如用vue这种框架写起来貌似还有点爽~😄
做一个有序列表(与预处理器比较)
<ul>
  <li><p>分块</p></li>
  <li><p>分块</p></li>
  <li><p>分块</p></li>
</ul>
假如使用scss来生成序号,但是列表长度无法预知,也需要尽量写安全(多)的遍历次数来保证样式覆盖:
ul,li {
  list-style: none;
}
li {
  @for $i from 1 through 10 {
    &:nth-of-type(#{$i}) {
      p {
        position: relative;
        padding-left: 3em;
        &::before {
          content: '第#{$i}.';
          position: absolute;
          left: 0;
          top: 0;
        }
      }
    }
  }
}
假如使用vue代码来写的话
<div id="app">
  <dl>
    <dt>使用css变量写法</dt>
    <dd v-for="(i, index) in len" :style="`--index: ${index+1}`">分块</dd>
  </dl>
</div>
#app {
  dd {
    position: relative;
    counter-reset: number calc(var(--index));
    padding-left: 3em;
    &::before {
      content: ""counter(number);
      position: absolute;
      left: 0;
      top: 0;
    }
  }
}
至少保证不会多出无用css...
用在小程序中
原生的 .wxss 不支持css预处理器,万一有视觉变动,全局替换代码还是很恶心的,这个时候使用css变量可以作为很好的补充。
web开发中顶层变量的key名是:root,小程序使用page
page { /* :root */
  --main-bg-color: brown;
}
兼容性处理
对于不支持 CSS 变量的浏览器,可以采用下面的写法
- 样式覆盖
a {
  color: #7F583F;
  color: var(--primary);
}
@support命令进行检测
@supports ((--a: 0)) {
  /* supported */}
@supports (not (--a: 0)) {
  /* not supported */
}
- JavaScript 也可以检测浏览器是否支持 CSS 变量
const isSupported =
  window.CSS &&
  window.CSS.supports &&
  window.CSS.supports('--a', 0);

if (isSupported) {
  /* supported */
} else {
  /* not supported */
}