webpack-loader
面试题😅
webpack loader和plugin的区别是什么
Webpack 中的 loader 和 plugin 都是用于处理不同类型文件和任务的工具,但它们的功能和作用略有不同。
loader:负责将模块文件按照一定的规则进行转换,例如将 ES6 语法转换成 ES5 语法、将 CSS 文件转换成 JavaScript 模块等。plugin:在打包过程中拦截和修改资源文件。例如,UglifyJSPlugin用于压缩 JavaScript 代码,HtmlWebpackPlugin用于生成 HTML 文件,CleanWebpackPlugin用于清理输出目录等。插件通过监听 Webpack 的事件钩子来实现自己的功能,在构建流程中调整资源,修改输出内容等。
简而言之,loader 处理具体的文件,而 plugin 则处理构建过程。
webpack和gulp能相互替代吗
Webpack主要用于模块打包和代码分割,能够将各种类型的资源(如JS、CSS、图片等)打包成静态资源,并按需加载,提高应用性能。Webpack的核心思想是基于模块化的开发,强调代码的组织和管理。因此,Webpack适合用于大型应用的构建,特别是单页应用(SPA)和复杂的应用场景。
Gulp则是一个自动化构建工具,可以用于自动化执行各种任务,如文件压缩、文件合并、图像优化等等。Gulp的核心思想是基于任务流的自动化构建,强调过程的规范和自动化。因此,Gulp适合用于小型应用的构建和开发。
mini-css-extract-plugin
开发中常用 mini-css-extract-plugin - npm 来提取css内容到独立的css文件,它是怎么做到的? 首先看一下它如何使用:
const MiniCssExtractPlugin = require("mini-css-extract-plugin");

module.exports = {
  plugins: [new MiniCssExtractPlugin()],
  module: {
    rules: [
      {
        test: /\.css$/i,
        use: [MiniCssExtractPlugin.loader, "css-loader"],
      },
    ],
  },
};
因为内部同时定义了 loader和plugin,所以应该先了解它们。
loader
如何编写loader
是一个 JavaScript 函数,它接收源文件作为输入内容,然后输出经过处理后的文件内容
手动实现一个简易loader:
- 创建
loader/rm-console.js文件并导出函数:
module.exports = function (source) {
    return source.replace(/console\.log\((.*)\);?/gm, "");
}
// 它接收一个参数 `source`,即为输入的源文件内容
- 将编写的函数引入到webpack配置中:
module: {
    rules: [
        {
            test: /\.js$/,
            use: [resolve('./loader/rm-console')]
        }
    ]
},
一个简易功能的loader就完成了
疑问:
- 项目中引入loader的几种方式?
引入方式还可以通过npm link(方便跨项目调试)、npm发包或者通过resolveLoader匹配目录
    resolveLoader: {
        modules: ['node_modules', path.resolve(__dirname, 'loaders')],
    },
- loader代码应该怎样调试?
console.logYYDS- 使用 Node.js 自带的调试工具启动调试
node --inspect-brk ./node_modules/.bin/webpack --config webpack.config.js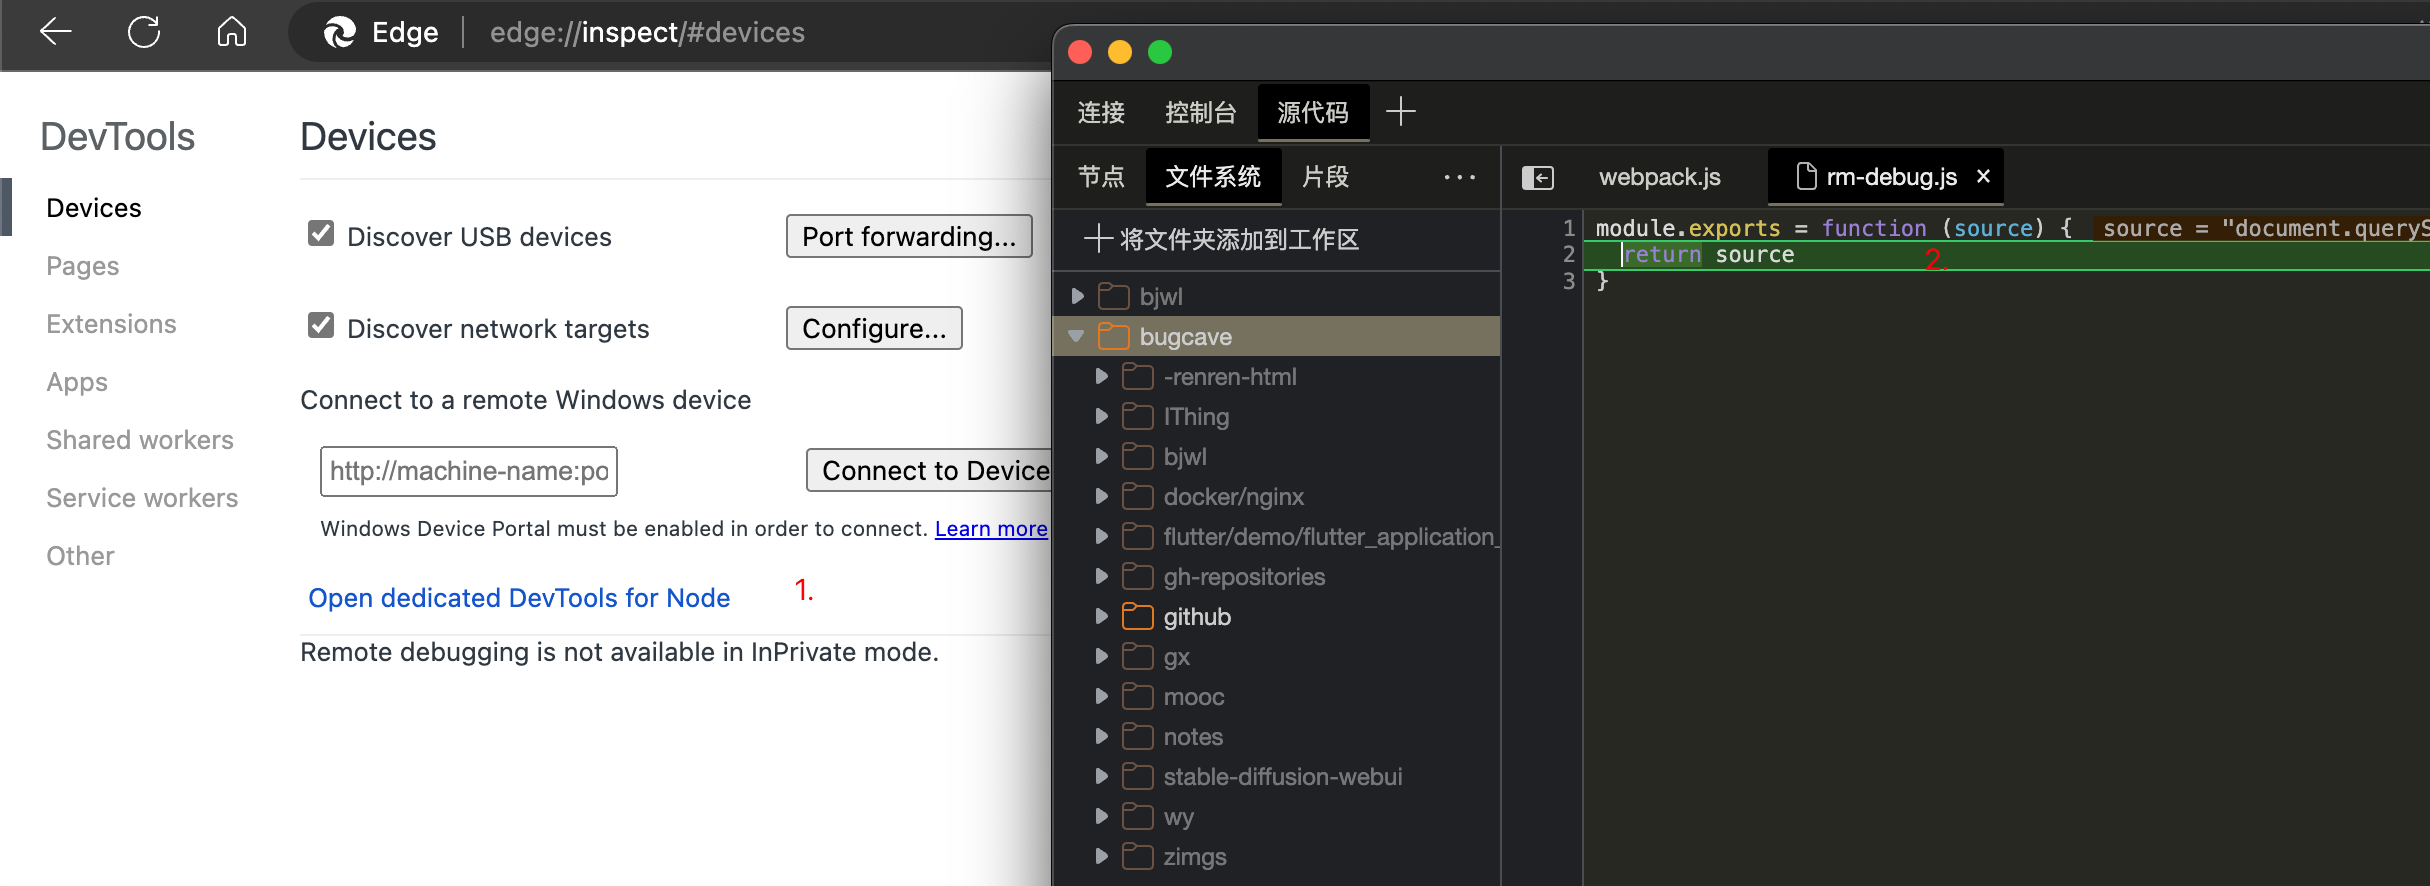
- vscode中npm script可以直接唤起调试进程,结合
debugger真香
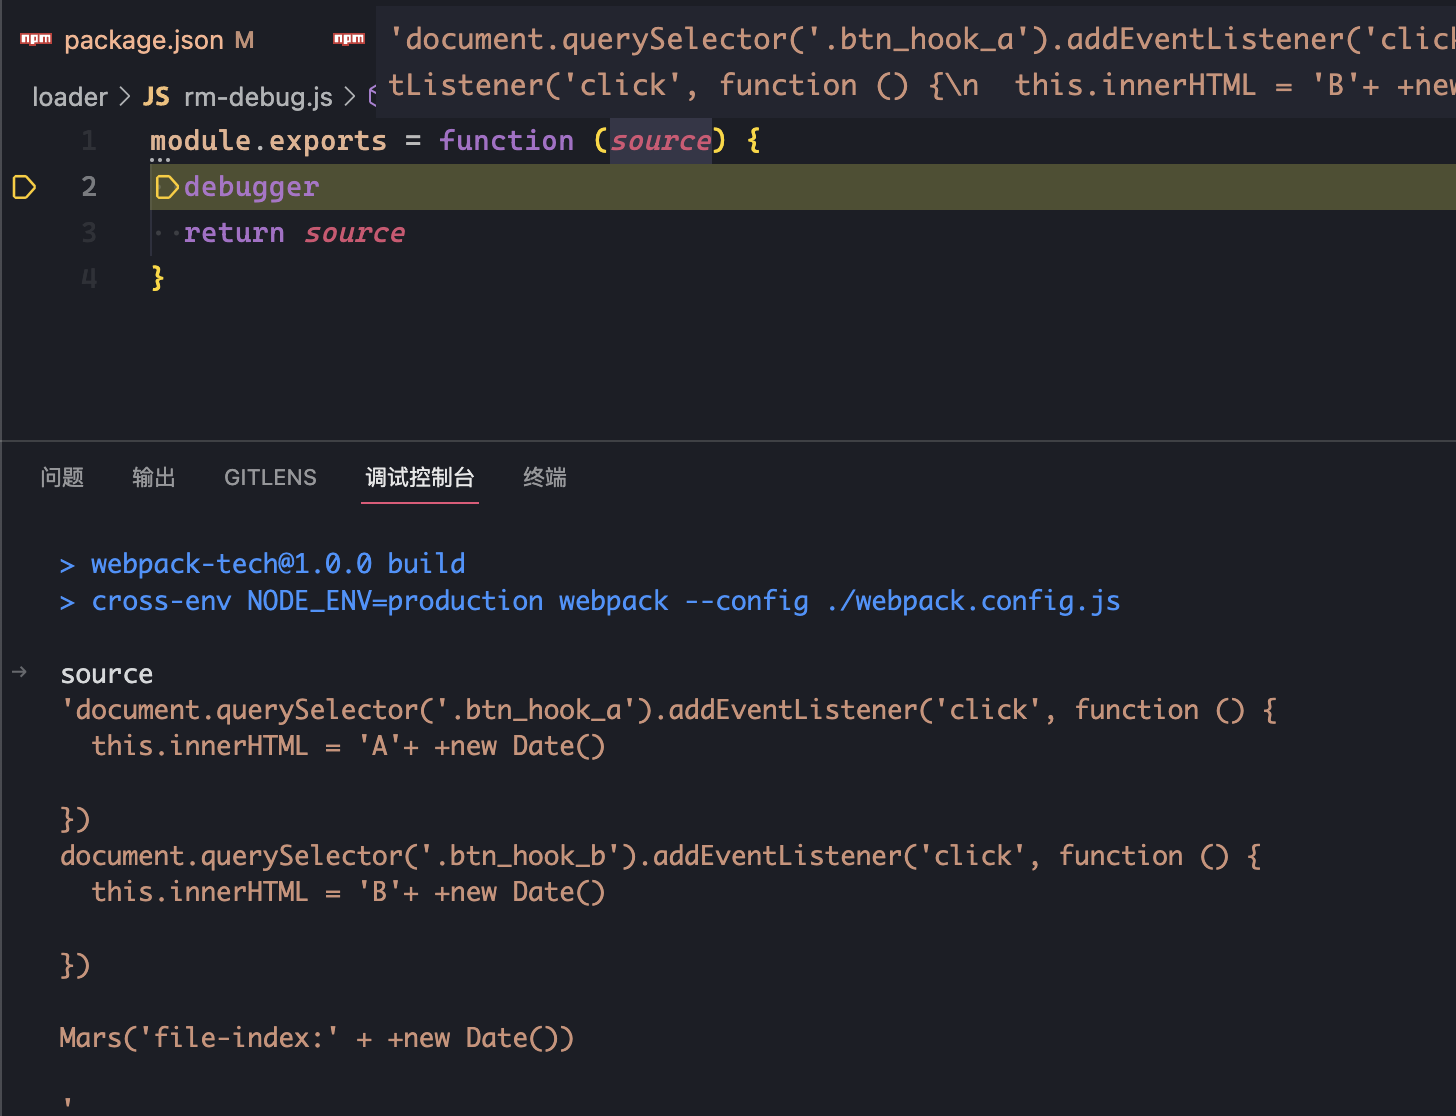
npm install 的包直接在
node_modules中结合debugger调试更方便
链式调用
loader常规导出
Webpack 中多个 Loader 的执行顺序通常是从右到左的(即从后往前执行),再写一个rm-debug的loader:
module.exports = function (source) {
    console.log('rm-debug')
    return source
}
module: {
    rules: [
        {
            test: /\.js$/,
            use: [resolve('./loader/rm-debug'), resolve('./loader/rm-console')]
        }
    ]
},
打印顺序是rm-console -> rm-debug
导出pitch
我在 rm-debug 修改后:
module.exports = function (source) {
    console.log('rm-debug')
    return source.replace(/\bdebugger;?/g, '')
}
module.exports.pitch = function() {
    console.log('--- debug Pitch ---');
    return 'module.exports = "pitch 2";'
};
控制台rm-console和rm-debug都没有打印,只有--- debug Pitch ---被打印,为什么?
官方文档pitching-loader
按官网的演示,在 Loader 链中,只要有一个 Loader 的 pitch 函数返回值不为 undefined,那么 Webpack 将停止执行当前 Loader 链,并以相反的顺序调用被跳过的 Loader 的 pitch 函数和已经被执行的 Loader 的 normal 函数。
通过使用 pitch 函数,可以在某个 Loader 执行前对文件进行预处理:
module.exports = function (content) {
  return someSyncOperation(content, this.data.value);
};

// 函数的参数分别是:当前loader的剩余请求,当前loader的前置请求,当前loader的data
module.exports.pitch = function (remainingRequest, precedingRequest, data) {
  data.value = 42;
};
可以看出 pitch 函数的执行顺序是先于 normal loader 的,这个data 就是在 pitch 阶段和 normal 阶段之间共享的 data 对象 (loader链中的data是不共享的)
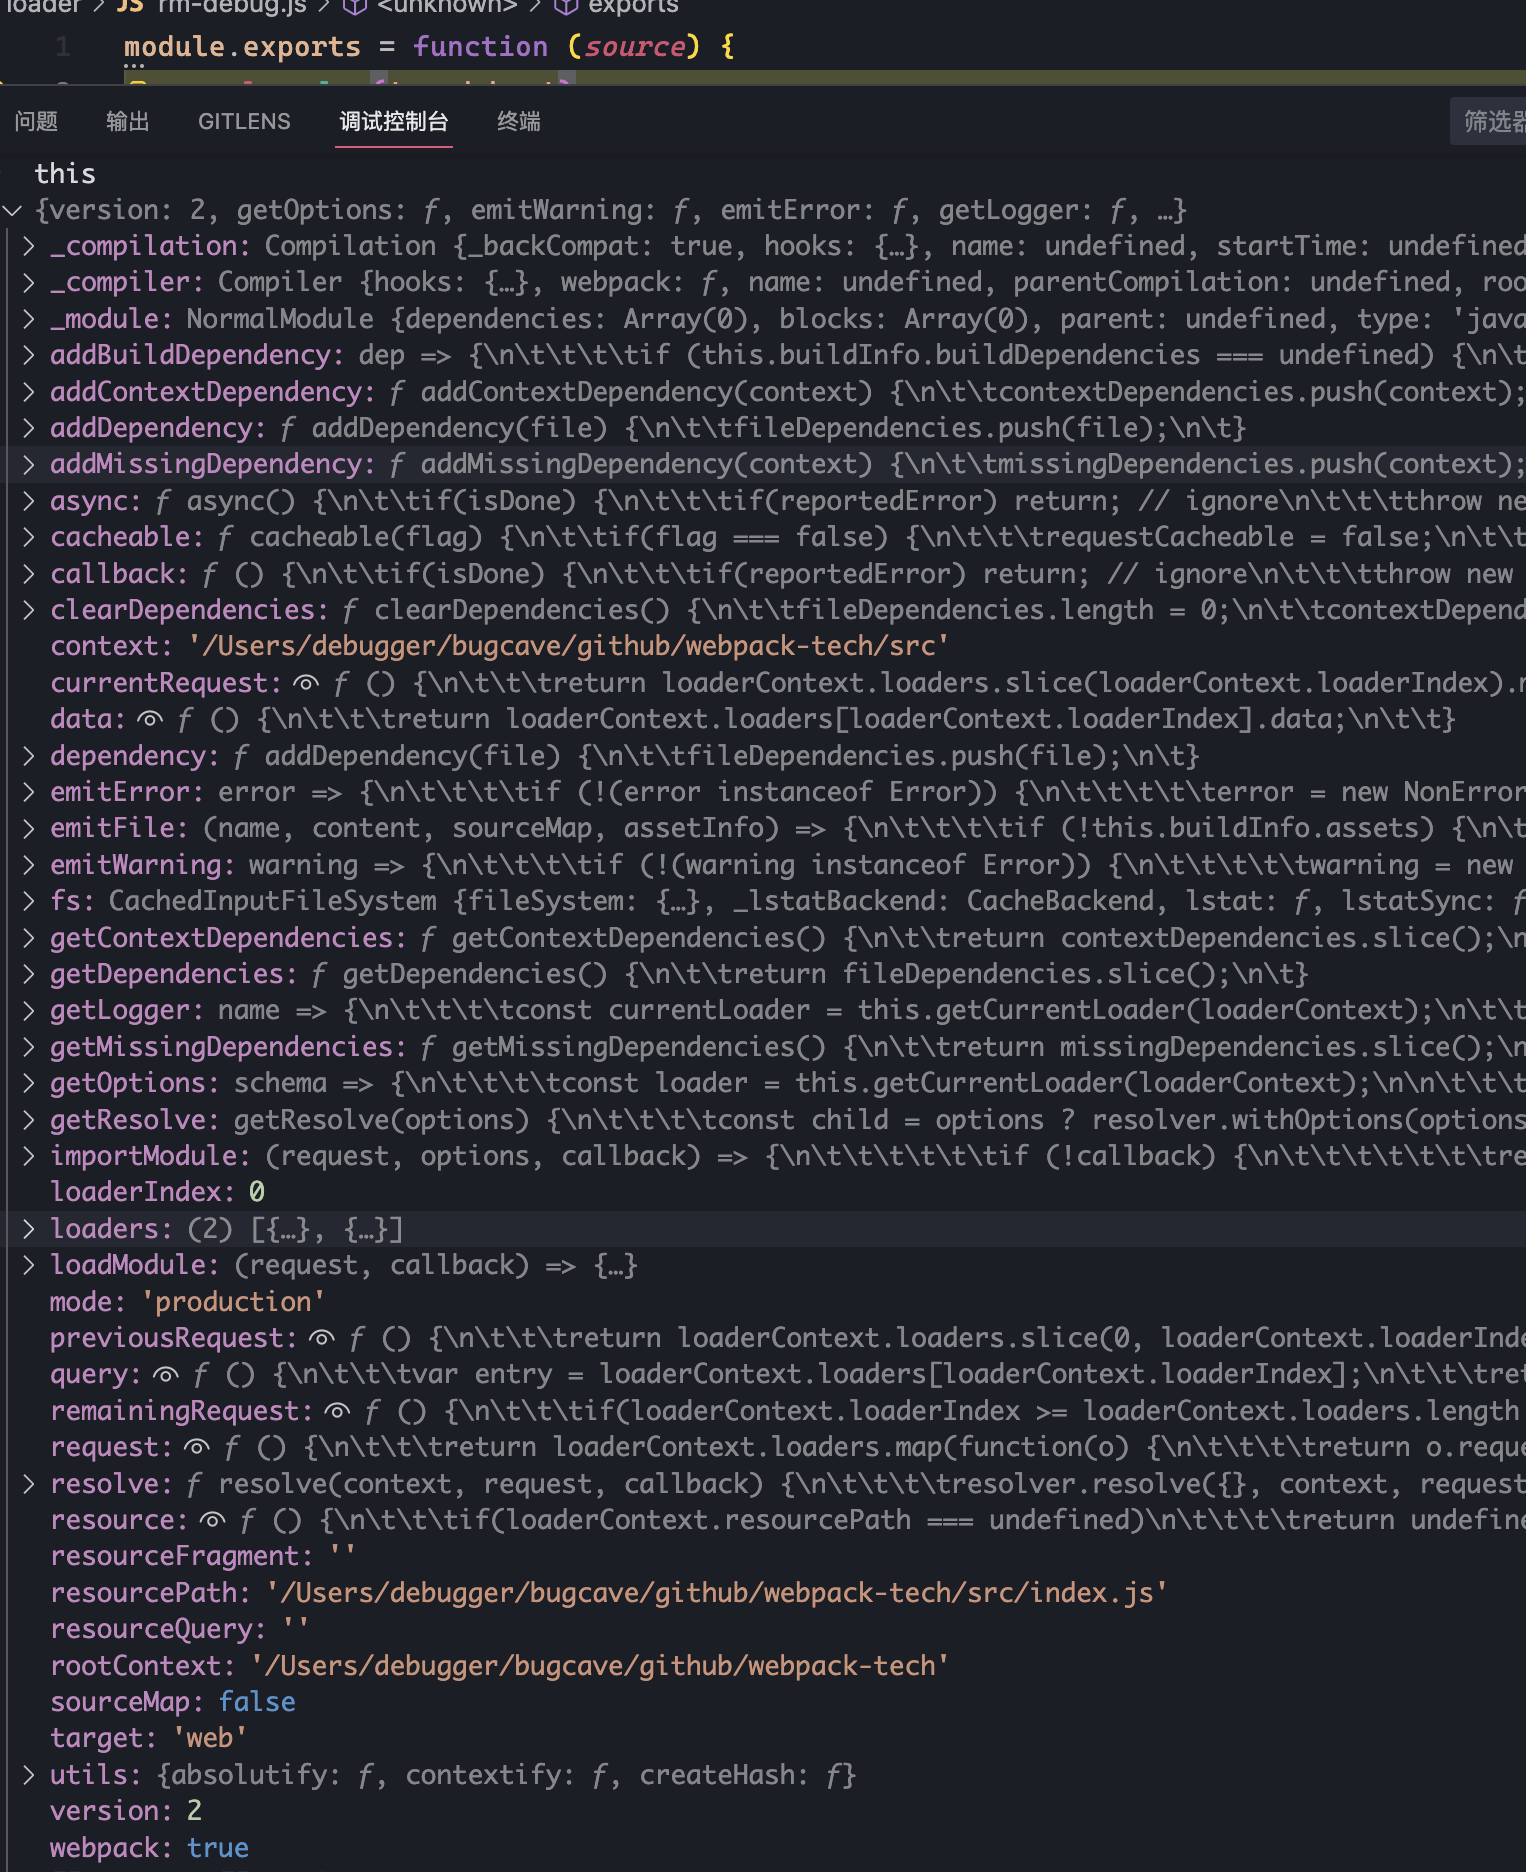
常用API
除了可以通过this.data共享数据,还提供了很多上下文的方法或属性:
this.callback
可以同步或者异步调用的并返回多个结果的函数
this.callback(
  err: Error | null, // 表示在处理Loader过程中是否发生错误,如果没有错误则为`null`
  content: string | Buffer, // 表示处理后的代码内容,可以是字符串或Buffer类型
  sourceMap?: SourceMap, // 可以被 this.module 解析的 sourceMap
  meta?: any // 会被 webpack 忽略,可以是任何东西(例如一些元数据)
);
如果希望在 loader 之间共享公共的 AST,可以将抽象语法树 AST(例如
ESTree)作为第四个参数(meta)传递,以加快构建时间。this.async
通知 loader-runner 这个 loader 将会异步地回调。返回
this.callback。this.query
从webpack配置文件中传递给当前loader的参数对象:
use: [
    { loader: resolve('./loader/rm-debug'), options: { a: 1 } },
    resolve('./loader/rm-console')
]
例如
babel-loader中的presets和plugins可以在配置文件中指定loader的选项this.resource
当前处理的文件的绝对路径,比如在loader中检查特定的文件类型,并应用相应的处理逻辑:
// 自定义loader转换markdown为HTML
const marked = require('marked')
module.exports = function(source) {
if (this.resource.endsWith('.md')) {
const html = marked(source)
return export default ${JSON.stringify(html)}
} else {
return source
}
}
##### this.loadModule 和 this.loadModuleAsync
用于加载其他模块并返回它们的源代码,区别是`同步返回`和`异步返回`:
- `this.loadModule(request: string, callback: function(error: Error?, source: string, sourceMap: object?, module: object?)`
- `this.loadModuleAsync(request: string, callback: function(error: Error?, source: string, sourceMap: object?, module: object?)`
在loader中异步的加载其他依赖项来处理输入内容:
```js
// 自定义loader处理svg文件
module.exports = function(source) {
  const callback = this.async()
  const filePath = this.resourcePath

  this.loadModule(`!raw-loader!svgo-loader?useConfig=svgoConfig!${filePath}`, (err, result) => {
    if (err) return callback(err)

    const optimizedSvg = result[0].toString()
    const svgModule = `export default ${JSON.stringify(optimizedSvg)}`
    callback(null, svgModule)
  })
}
this.resolve
解析模块请求的路径。可以将回调函数用作第二个参数或返回一个Promise来进行异步解析: this.resolve(context: string, request: string, callback: function(error: Error?, result:string))
// 自定义loader处理scss文件
const sass = require('sass')
module.exports = function(source) {
  const callback = this.async()

  this.resolve(this.context, './variables.scss', (err, result) => {
    if (err) return callback(err)

    sass.render({
      data: `${source} $primary-color: red; @import "${result}"`,
      includePaths: [this.context]
    }, (err, output) => {
      if (err) return callback(err)

      const css = output.css.toString()
      callback(null, css)
    })
  })
}
this.addDependency
this.addDependency(file: string): 将外部资源添加到依赖列表中,以便在监视模式下重新编译时重新构建:
// 自定义loader处理图片文件
module.exports = function(source) {
  const callback = this.async()

  this.loadModule(`!file-loader?name=[hash].[ext]!${this.resource}`, (err, result) => {
    if (err) return callback(err)

    const imageUrl = result[0]
    const imageModule = `export default ${JSON.stringify(imageUrl)}`
    this.addDependency(imageUrl) // 将图片文件添加到依赖列表中
    callback(null, imageModule)
  })
}
this.addContextDependency
与 this.addDependency 类似,只不过是添加的目录:
// 自定义loader处理markdown文件中的图片
const markdownIt = require('markdown-it')
const path = require('path')
module.exports = function(source) {
const callback = this.async()
const md = new markdownIt()
const imageRegex = /\!\[(.*?)\]\((.*?)\)/g
let match
while ((match = imageRegex.exec(source)) !== null) {
const imagePath = match[2]
if (imagePath.startsWith('/')) continue // 忽略绝对路径的图片
const imageUrl = path.join(path.dirname(this.resourcePath), imagePath)
this.addContextDependency(imageUrl) // 将图片所在目录添加到上下文依赖列表中
const absoluteImageUrl = path.resolve(process.cwd(), imageUrl)
const replacement = ``
source = source.replace(match[0], replacement)
}
const html = md.render(source)
const moduleCode = `export default ${JSON.stringify(html)}`
callback(null, moduleCode)
}
this.emitFile 和 this.getAssetPath
emitFile输出文件getAssetPath获取在output中生成的资源的相对路径 在loader中生成输出文件,并将其作为其他依赖项的输入:
// 自定义loader处理markdown文件中的图片并输出成单独的文件
const fs = require('fs')
const path = require('path')
const markdownIt = require('markdown-it')
module.exports = function(source) {
const callback = this.async()
const md = new markdownIt()
const imageRegex = /\!\[(.*?)\]\((.*?)\)/g
let match
while ((match = imageRegex.exec(source)) !== null) {
const imagePath = match[2]
if (imagePath.startsWith('/')) continue // 忽略绝对路径的图片
const imageUrl = path.join(path.dirname(this.resourcePath), imagePath)
const absoluteImageUrl = path.resolve(process.cwd(), imageUrl)
const extension = path.extname(absoluteImageUrl).slice(1)
const fileName = `${match[1]}.${extension}`
const outputPath = path.join(this.outputPath, fileName)
fs.copyFileSync(absoluteImageUrl, outputPath) // 将图片文件复制到输出目录中
const relativePath = this.getAssetPath(outputPath) // 获取在output中生成的资源的相对路径
const replacement = ``
source = source.replace(match[0], replacement)
}
const html = md.render(source)
const moduleCode = `export default ${JSON.stringify(html)}`
callback(null, moduleCode)
}
loader-utils - npm 提供了很多工具的方法解析参数,可以更方便的编写
loader,如解析、拼接路径、获取options参数